How to Prevent Dry Rot on a Portland Home
The siding looked fine from the street. The paint was intact, the trim was straight, and the homeowner had repainted the south and west elevations three years earlier. The north elevation had not been repainted — it faced the fence line, received almost no direct sun, and was easy to overlook. When a gutter bracket failed during a November rainstorm and water began sheeting down the north wall instead of flowing into the downspout, the homeowner noticed it within a week. The repair took two hours. But when the siding contractor arrived to repaint the north elevation the following summer, he found the bottom three courses of siding soft to the touch. The wood behind the failed gutter bracket had been wet for one season, but the bottom courses had been holding moisture for years. No one had inspected them. No one had noticed the moss growing along the bottom edge, trapping moisture against the wood surface. The gutter failure was the event. The lack of routine inspection was the cause.
Dry rot prevention is not a single action. It is a set of maintenance practices that keep water out of wood and keep wood dry enough that decay fungi cannot colonize. In Portland's climate — with 37 or more inches of annual rainfall distributed across six to eight months of sustained humidity — those practices are not optional. They are the difference between exterior wood that lasts decades and exterior wood that fails within years.
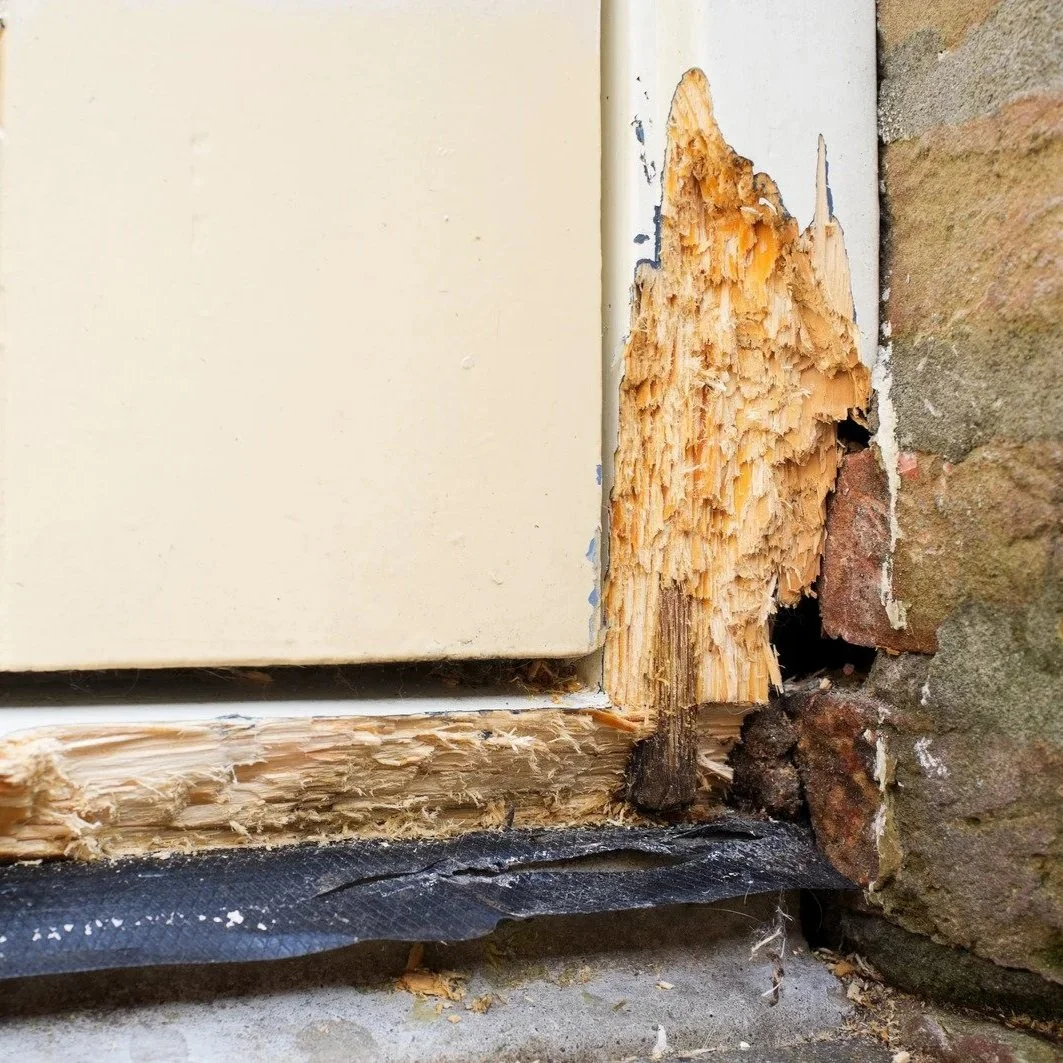
Severely rotted wooden door frame corner showing moisture damage and decaying exterior trim beside a brick wall surface.
Why Portland's Climate Creates Dry Rot Conditions
Decay fungi require three conditions to colonize wood: moisture content above approximately 20%, temperatures between 40 and 100 degrees Fahrenheit (with optimal growth between 60 and 75 degrees), and a food source (the cellulose in wood). Portland's climate provides two of these three conditions for most of the year.
Sustained moisture, not single events. A single rainstorm does not cause dry rot. Sustained moisture — wood that gets wet and stays wet long enough for fungal spores to germinate and establish — causes dry rot. Portland's rainfall pattern is not a series of heavy storms followed by drying periods. It is months of moderate, persistent rain with limited drying between events. From October through May, exterior wood in Portland may never fully dry between rain cycles, particularly on north-facing elevations that receive minimal direct sunlight.
Temperature range. Portland's average temperatures fall within the optimal range for fungal growth from approximately April through November. The combination of adequate moisture and adequate temperature during these months means that any wood holding moisture above 20% is actively supporting fungal colonization for more than half the year.
The housing stock. Portland's housing stock includes a large number of homes built between 1940 and 1990 with original wood siding, original building paper, and original flashing details that may not meet current moisture management standards. Homes in this age range that have not had their flashing, caulk, and building paper updated are the most vulnerable to dry rot — the original moisture barriers have degraded, and the wood behind them has been absorbing moisture through failed joints for years or decades.
The Moisture Pathway: What Prevention Actually Controls
Every dry rot prevention measure targets one or more points in the moisture pathway — the route water takes from the exterior surface to the wood substrate. Understanding the pathway explains why each measure matters and what happens when it fails.
Primary moisture barriers. The first line of defense is the exterior surface itself — paint, stain, or factory finish on siding and trim. An intact paint film sheds water from the surface. When paint fails — through UV degradation, mechanical damage, or moisture pushing from behind — the bare wood absorbs rain directly. The second line is the building paper, or house wrap, behind the siding, which collects any water that penetrates the cladding layer. The third line is flashing at intersections — windows, doors, roof-to-wall joints, deck ledger connections — which directs water back to the exterior surface at every penetration.
Where the pathway breaks. The pathway fails at joints, penetrations, and transitions — the points where two materials meet or where a horizontal surface meets a vertical surface. The bottom corners of window casings, the junction between trim and siding, the top edge of a deck ledger, the base of door frames, and the intersection where a roof slope meets a sidewall are all failure points. These are the locations where caulk fails, where flashing degrades or was never properly installed, and where water enters the wall system.
The 20% threshold. Wood with a moisture content below 20% does not support fungal growth. Wood above 20% is at risk. Wood above 28% is at the saturation point where active decay is likely occurring. Every prevention measure works toward keeping wood below that 20% threshold — by keeping water off the wood, keeping water out of the wall system, and allowing wet wood to dry before fungi can establish, per the USDA Forest Products Laboratory.
Prevention Measures That Work
The following measures are listed in order of impact — the items that prevent the most rot damage when maintained, and cause the most rot damage when neglected.
Functional flashing at all intersections. Flashing is the most critical moisture management component on any wood-frame building. Properly installed flashing at window heads, at roof-to-wall intersections (including kickout flashing at the bottom of roof-to-wall joints), at deck ledger connections, and at all horizontal-to-vertical transitions directs water to the exterior surface before it can enter the wall system. When flashing fails — through corrosion, improper lapping, or omission during original construction — water enters the wall cavity at the intersection and saturates the framing behind the cladding. The rot that develops behind failed flashing is invisible from the exterior until significant structural damage has occurred.
Kickout flashing. Where a roof slope terminates against a sidewall, kickout flashing at the bottom of the intersection directs water into the gutter instead of behind the siding. Missing kickout flashing is one of the most common causes of concealed dry rot on Portland homes — the water follows the roof-to-wall joint directly behind the siding, saturating the sheathing and framing below. Kickout flashing is inexpensive to install and prevents one of the most costly rot patterns.
Intact caulk at all joints and penetrations. Exterior caulk seals the joints between trim and siding, around window and door perimeters, at corner boards, and at any exterior penetrations. Caulk has a finite lifespan — high-quality polyurethane or siliconized acrylic caulk lasts 10 to 20 years, depending on exposure, but expansion and contraction cycles, UV exposure, and physical movement of the building eventually break the bond. Failed caulk joints allow water behind the trim and siding at every rain event. Inspecting and replacing failed caulk is one of the lowest-cost, highest-impact prevention measures available.
Grade clearance. Wood siding and trim should maintain at least 6 inches of clearance from finished grade — soil, mulch, concrete, or pavers. When siding contacts or is close to grade, soil moisture wicks into the wood through capillary action, splash-back from rain keeps the bottom courses perpetually wet, and debris accumulates against the wood surface, trapping moisture. Many Portland homes — particularly those built before 1970 — have settled or had landscaping added that has reduced the original grade clearance. Restoring clearance by regrading, removing soil or mulch from contact with siding, or trimming the bottom siding course is a direct prevention measure.
Functional gutters and downspouts. Gutters collect roof runoff and direct it away from the building envelope through downspouts. When gutters clog — with leaves, moss, and debris — they overflow. Overflow water runs down the fascia, behind the siding, and saturates the wall at the gutter line. In Portland, where deciduous trees and moss are prevalent, gutters require cleaning at minimum twice per year — once in late fall after leaf drop and once in spring. Downspouts should discharge at least 4 feet from the foundation, either through extensions or underground drain lines.
Paint and finish maintenance. An intact paint or stain film is the first barrier between rainwater and wood. Paint that is cracking, peeling, or chalking is no longer shedding water — it is allowing water to reach the bare wood underneath. In Portland's climate, exterior paint on wood siding typically lasts 7 to 10 years on south and west elevations (higher UV exposure accelerates degradation) and 10 to 15 years on north and east elevations (less UV but more moisture exposure). The paint schedule should be driven by condition, not calendar — when the paint film begins to fail, repainting before bare wood is exposed prevents moisture infiltration.
Moss and algae removal. Moss and algae grow readily on wood surfaces in Portland, particularly on north-facing elevations, under tree canopy, and on any surface that stays damp. Moss holds moisture against the wood surface, extending the wetting period after each rain event and keeping the wood above the 20% moisture threshold for prolonged periods. Algae discolors the surface and indicates persistent surface moisture. Removing moss and algae — by brushing, low-pressure washing, or applying a moss-killing treatment — and addressing the underlying shade or drainage conditions that support their growth is a direct rot prevention measure.
Landscaping clearance. Shrubs, groundcover, and plantings in contact with or close to exterior siding and trim trap moisture against the wood, block airflow that promotes drying, and create a microclimate favorable to fungal growth. Maintaining at least 12 inches of clearance between landscaping and the building envelope allows air circulation and prevents vegetation from holding moisture against wood surfaces. This is particularly important on north-facing elevations where drying is already limited.
Seasonal Prevention Schedule for Portland
Portland's climate creates a specific schedule for when prevention tasks are most effective and most needed.
Late fall (November). Clean gutters after leaf drop. Inspect downspout connections and extensions. This is the start of the wet season — any gutter blockage now means months of overflow against the building.
Winter (December-February). Monitor for active leaks during heavy rain. Note any interior staining, musty odors, or water marks that appear during storms — these indicate exterior moisture penetration. Do not attempt exterior paint or caulk work during the wet season; note locations for spring repair.
Early spring (March-April). Inspect all caulk joints, paying particular attention to window and door perimeters, trim-to-siding joints, and corner boards. Replace any failed caulk. This is the best time for caulk work — the wood has been wet all winter, and any failed joints are visible as staining or peeling at the joint. Clean gutters again to remove winter debris.
Late spring (May-June). Address paint failures identified during winter and spring inspections. Scrape, prime, and repaint any bare-wood areas. This is the start of the drying season — paint applied now has the longest curing window before the next wet season.
Summer (July-August). The best time for a full exterior inspection. Walk the perimeter of the house and inspect every elevation from grade to roofline. Probe any suspicious areas with a screwdriver. Check grade clearance at all siding-to-ground transitions. Remove moss and algae from wood surfaces. Note any areas that need attention before the wet season begins.
Early fall (September-October). Complete any repairs identified during the summer inspection — paint, caulk, flashing corrections, grade adjustments. This is the last window before the wet season. Any moisture entry point left open now will be active for the next six to eight months.
| Season | Task | Why This Timing |
|---|---|---|
| Late fall (Nov) | Clean gutters, check downspouts | Before wet season overflow starts |
| Winter (Dec-Feb) | Monitor for active leaks | Rain reveals moisture entry points |
| Early spring (Mar-Apr) | Replace failed caulk, clean gutters | Failed joints visible after wet season |
| Late spring (May-Jun) | Repaint bare wood areas | Longest drying window for paint cure |
| Summer (Jul-Aug) | Full exterior inspection and probing | Wood at driest, rot most distinguishable |
| Early fall (Sep-Oct) | Complete all repairs | Last window before next wet season |
What to Do When Prevention Was Not Enough
Prevention measures reduce the risk of dry rot but do not eliminate it entirely — particularly on older homes where the original moisture management details have degraded over decades. When an inspection reveals signs of rot despite maintenance efforts, the response depends on the location and extent.
Surface rot on non-structural elements. Rot confined to the surface of a trim board, a siding course, or a decorative element — where the screwdriver probe reveals softening in the outer 1/4 to 1/2 inch but sound wood beneath — may be addressed by removing and replacing the affected piece, correcting the moisture source, and maintaining the new material with paint and caulk. The key is correcting the moisture entry that caused the rot — replacing the wood without fixing the water source guarantees the rot returns.
Rot at structural locations. Rot at a rim joist, sill plate, header, or stud — detected by probing at window corners, door frames, or the bottom of the wall — requires professional assessment. Structural rot affects load-bearing capacity and cannot be assessed from the surface alone. The wall or cladding must be opened to determine the full extent of damage.
Rot that returns after a previous repair. If rot reappears at a location that was previously repaired — particularly if the previous repair involved filling with wood filler, epoxy, or hardener rather than removing the compromised material — the moisture source was not corrected. Patched rot typically returns within 3 to 7 years, and the scope of damage increases with each cycle. A professional assessment is needed to identify and correct the moisture pathway and remove all compromised material.
Wood Treatment and Material Selection
Choosing the right materials and treatments for exterior wood adds a layer of protection beyond maintenance practices.
Pressure-treated lumber. Pressure-treated lumber — treated with preservatives such as Copper Azole (CA) or Alkaline Copper Quat (ACQ) — resists fungal decay significantly longer than untreated wood. The USDA Forest Products Laboratory reports that properly treated wood can last 15 to 40 years longer than untreated wood in the same exposure conditions, depending on the preservative, retention level, and exposure category. Pressure-treated lumber is appropriate for structural elements in contact with or close to moisture sources — sill plates, rim joists, posts, ledger boards, and any framing within 6 inches of grade.
Borate treatments for existing wood. Borate-based preservatives (sodium borate compounds) are effective against decay fungi and wood-boring insects when applied to wood that is protected from direct wetting. Borates diffuse into wet wood, making them useful as a remedial treatment on existing structures — they can be sprayed, brushed, or injected into framing and sheathing during repair or renovation. The USDA Forest Products Laboratory classifies borates as effective for above-ground, protected-from-wetting applications. Because borates are water-soluble, they leach when exposed to rain, limiting their use to wood that is behind cladding or otherwise sheltered from direct precipitation.
Naturally rot-resistant species. Western red cedar and redwood contain natural oils and tannins that resist fungal colonization. These species last longer than non-resistant species (such as hemlock or Douglas fir) in exterior applications, but they are not immune to rot — they still require paint or stain maintenance and proper moisture management. Cedar siding that is maintained with a quality finish and protected by functional flashing can last 40 years or more in Portland's climate. Cedar siding that is left unfinished or has failed flashing behind it will develop rot, though more slowly than non-resistant species.
Fiber cement and engineered alternatives. Fiber cement siding and engineered wood siding (such as LP SmartSide) are not susceptible to fungal decay. They eliminate the biological component of the rot equation entirely. However, the framing behind fiber cement is still wood — and if the flashing, caulk, and moisture management at joints and penetrations fail, the framing behind the siding can still develop rot. Rot-resistant cladding materials reduce the risk at the surface but do not eliminate the need for proper moisture management throughout the wall system.
Frequently Asked Questions
Prevention Is Maintenance
Dry rot prevention on a Portland home is not a one-time project. It is a maintenance practice — a set of inspections, repairs, and material choices repeated on a seasonal cycle for the life of the building. The flashing, caulk, paint, gutters, and grade clearance that keep water out of wood are all consumable components that degrade over time and need periodic renewal. The homeowner who inspects twice per year, replaces caulk before it fails completely, repaints before bare wood is exposed, and keeps gutters flowing will spend a fraction of what the homeowner who defers these tasks spends on structural rot repair. The cost of a caulk tube is measured in dollars. The cost of a rim joist replacement is measured in thousands. The difference between the two is the inspection that catches the failed joint before the framing behind it is compromised.
Schedule inspection — The most effective dry rot prevention in Portland starts with knowing the current condition. VResh Construction inspects all six common rot locations, probes suspect areas, checks moisture levels, and identifies moisture entry points before they become structural problems. The same inspection covers dry rot repair in Beaverton and Gresham. Call (503) 272-6436.