12 Steps a Real Sliding Door Replacement Should Follow
Quick Answer: A proper sliding door replacement follows a fixed twelve-step sequence, from full removal and opening inspection through sill pan, flashing, leveling, sealing, and a final walk-through. Skipping steps or doing them out of order is where most callbacks start.
A door swap sounds like a one-step job: old door out, new door in. In practice, it's closer to a dozen separate steps stacked in a specific order, and the order matters as much as the steps themselves. Install the door before the framing is confirmed sound, or trim it out before the air sealing is done, and the finished product looks identical to a job done correctly, right up until it doesn't.
What follows is the actual sequence, not a marketing simplification, with the reasoning behind why each step happens when it does.
Removal and Inspection Come Before Anything Touches the New Door
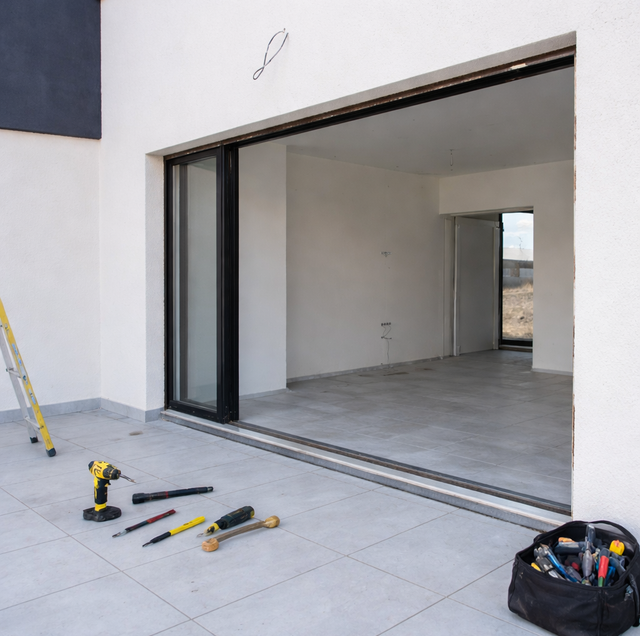
1. Full removal, not a partial swap: The first step is removing the entire existing unit, threshold, interior stops, and exterior trim, exposing the full rough opening down to the sill, head, and jambs. A door swapped in without exposing the framing underneath skips the one chance to catch a problem before it's sealed behind new material.
2. Inspecting before assuming: With the opening exposed, the sill plate, header, and adjacent subfloor get checked for existing moisture damage. Patio door sills are a common rot location precisely because water intrusion there often goes undetected for years behind a working-looking door. Findings at this stage, good or bad, get written down before anything else happens.
3. Structural repair, if the inspection finds it: If the sill plate, subfloor sheathing, or surrounding framing shows compromised wood, that gets replaced before installation continues. Installing a new door into damaged framing doesn't fix the framing; it just hides the problem behind a fresh trim job for a few more years.
4. Lead protocols on older homes: On homes old enough to carry lead-based paint risk, painted surfaces being disturbed during removal get tested, and EPA renovation, repair, and painting protocols are followed for the rest of the removal and installation. This step exists specifically because disturbing old paint without containment and cleanup protocols creates a real hazard, not a hypothetical one.
The Water-Management Steps Nobody Sees Later
Ask to see the rough opening before it's closed up, especially after any structural repair. A quick photo of the exposed sill and framing takes a minute and gives a record of work that's otherwise invisible once trim goes back on.
5. Sill pan installation: A formed pan goes into the base of the rough opening to catch anything that gets past the door's own drainage and route it back outside. This is the step most commonly missing from lower-cost installations and the most direct cause of sill rot failures traced back to a specific missing part.
6. Drainage plane integration: The new door installation has to lap correctly into the existing water-resistive barrier around the opening, the housewrap or building paper layer that manages bulk water at the wall surface. On older homes without a continuous barrier in that area, a new section gets installed rather than leaving a gap in the drainage plane.
7. Head flashing: Above the opening, flashing gets installed and integrated into the water-resistive barrier so water running down the wall face is directed around the top of the opening rather than into it. Like the sill pan, this is a field-installed step; no door product ships with its own head flashing built in.
Setting, Sealing, and Finishing the Door
8. Installation and leveling: The door unit itself gets set plumb, level, and square in the now-properly-flashed opening, and every panel's operation gets tested before any trim goes on. A door that's slightly out of level at this stage is far easier to correct now than after trim locks it in place.
9. Air sealing: The gap between the door frame and the surrounding rough framing gets filled with low-expansion foam before interior trim goes on. This is the step that actually stops drafts, more often than the door panel itself, since most draft complaints trace to an unsealed gap rather than a defective seal on the door.
10. Exterior trim and caulk: Exterior casing goes on back-primed and bedded in sealant, with all exterior joints caulked to the manufacturer's specification. This is the last line of defense against bulk water, not the first, which is why it comes after the pan and flashing rather than instead of them.
11. Interior trim, threshold, and final testing: Interior casing and the threshold go in last, followed by hardware installation and a final operation test on every panel before the job is considered finished.
12. Walk-through and documentation: A completed installation gets reviewed with the homeowner directly, with written warranty documentation provided at that point, not mailed later or left to be tracked down.
Why the Sequence Matters More Than the Checklist
Any of these individual steps can be described in a sales conversation. What's harder to verify from a written estimate is whether they happen in the right order, with the right steps completed before the next one starts. A sill pan installed correctly after damaged framing has already been replaced protects that new framing. A sill pan installed before the framing check happens protects nothing, because whatever damage was already there gets sealed in behind it.
Frequently Asked Questions
The core sequence stays the same: removal, inspection, structural repair if needed, sill pan and flashing, installation, sealing, trim, walk-through. What changes is scale and a couple of added considerations. Multi-slide and lift-and-slide systems typically add a structural header calculation to the scope, since a wider opening changes what the wall above it needs to carry. French doors add extra attention at the center meeting stile, a seam that doesn't exist on a single-track slider.
The scope of work changes at that point, and it should. A written estimate given before the opening was exposed is necessarily based on visible information only, so a change order covering the added repair, in writing, before work continues, is the normal next step rather than a red flag. Depending on how much framing is affected, this typically adds anywhere from a few hours to a full extra day to the timeline, which is worth asking about up front so it isn't a surprise mid-project.
It catches real problems more often than it should. Panel operation, lock engagement, and screen fit are all easier to test and adjust with the installer present than after the crew has left and the homeowner discovers an issue days later. A rushed or skipped walk-through is a common source of callback calls for something that would have taken two minutes to fix on-site.
Testing the painted surfaces that will be disturbed, containing the work area so dust and debris don't spread to the rest of the home or the surrounding yard, and a specific cleanup and verification process before the job is considered finished. It adds time to the removal and trim stages specifically, since that's where painted surfaces are cut, sanded, or pried loose, and it's worth asking whether a contractor is certified to perform this work before hiring, not just assuming it's handled.
Being there for the full day isn't necessary, but the inspection stage is worth planning around specifically. That's the point, right after the old door and trim come off and before anything gets covered back up, where hidden moisture damage gets found, and where a change order should get discussed and decided rather than announced after the fact once the trim is already back on. A homeowner who's reachable by phone during that window can weigh in on the spot; one who isn't is more likely to find out about an added cost after the decision's already been made.
A Sequence, Not a Shopping List
Twelve individual items can all appear on a written estimate without the estimate saying anything about the order they happen in or whether one gets skipped when the schedule runs tight. The sequence is what actually protects the wall behind the door, which makes it worth asking about directly rather than assuming a listed step happened at the right point in the job.
See the full written scope before work starts — every step in this sequence, sill pan and flashing included, spelled out in a written estimate so nothing gets assumed. VResh Construction serves the Portland metro. CCB #241979. Call (503) 272-6436.